Showing posts with label valspar. Show all posts

Monday, July 16, 2012

A not so mellow yellow

Last summer when I went did a redo of the front of the house, I replaced the front door. I was then, of course stuck with the task of picking a paint color. I think I went through about ten colors. I put little swatches up and asked my friends to drive by and give their opinions. I went with a pale yellow which I decided was too light, so I went with a brighter yellow. Within a month I decided that was too right and ended up painting it a coffee with cream-ish color. So I ended up without the yellow door I wanted so badly, until now!


For the last 2 months the back door looked like this....


Yeah I know don't judge- I couldn't decide! We've had a lot of friends over during this time and always solicited their opinions, which were pretty much 50/50 overall.

 J was fond of the orange, while I was digging on the yellow. Well yesterday I decided to pull the trigger and go with the yellow. The color is Lowe's Valspar in Golden Promise.


This yellow was the second yellow I originally painted the front door but decided it was too school-bus-ish for the front of the house. But in the backyard there are lots of bright yellow accents like the umbrella..

the plant holders...


a few pots...


and even my pillows...


Yeah, yellow is my spirit color. Here is my door painting tool kit.


It's crazy bright and I'm in love. If you're in Richmond, or VA you know it's been hot as heckity outside. (Calling for 100+ temps today and through the weekend!) So you may be asking yourself, how did she paint an exterior door in these hot temps and not end up with a clumpy gross door? Well under recommendation and gift of a friend I added Floetrol to the paint. Floetrol is an additive that can be mixed to any paint that thins the paint out and therefore helps mask brush stokes.


Not pimentos, but a travel bit of Floetrol! I added about 2 tablespoons to my paint and mixed it up with my paintbrush. Having painting with this quart before, the difference was noticeable. The paint went on smooth and light, which helped limit brushstrokes in every which direction. Again, here's the final product.


Now only if I had someone to build that pergola and redo the deck for me...!


Oh, I can dream...

Monday, April 30, 2012

Stair-ing part 3!

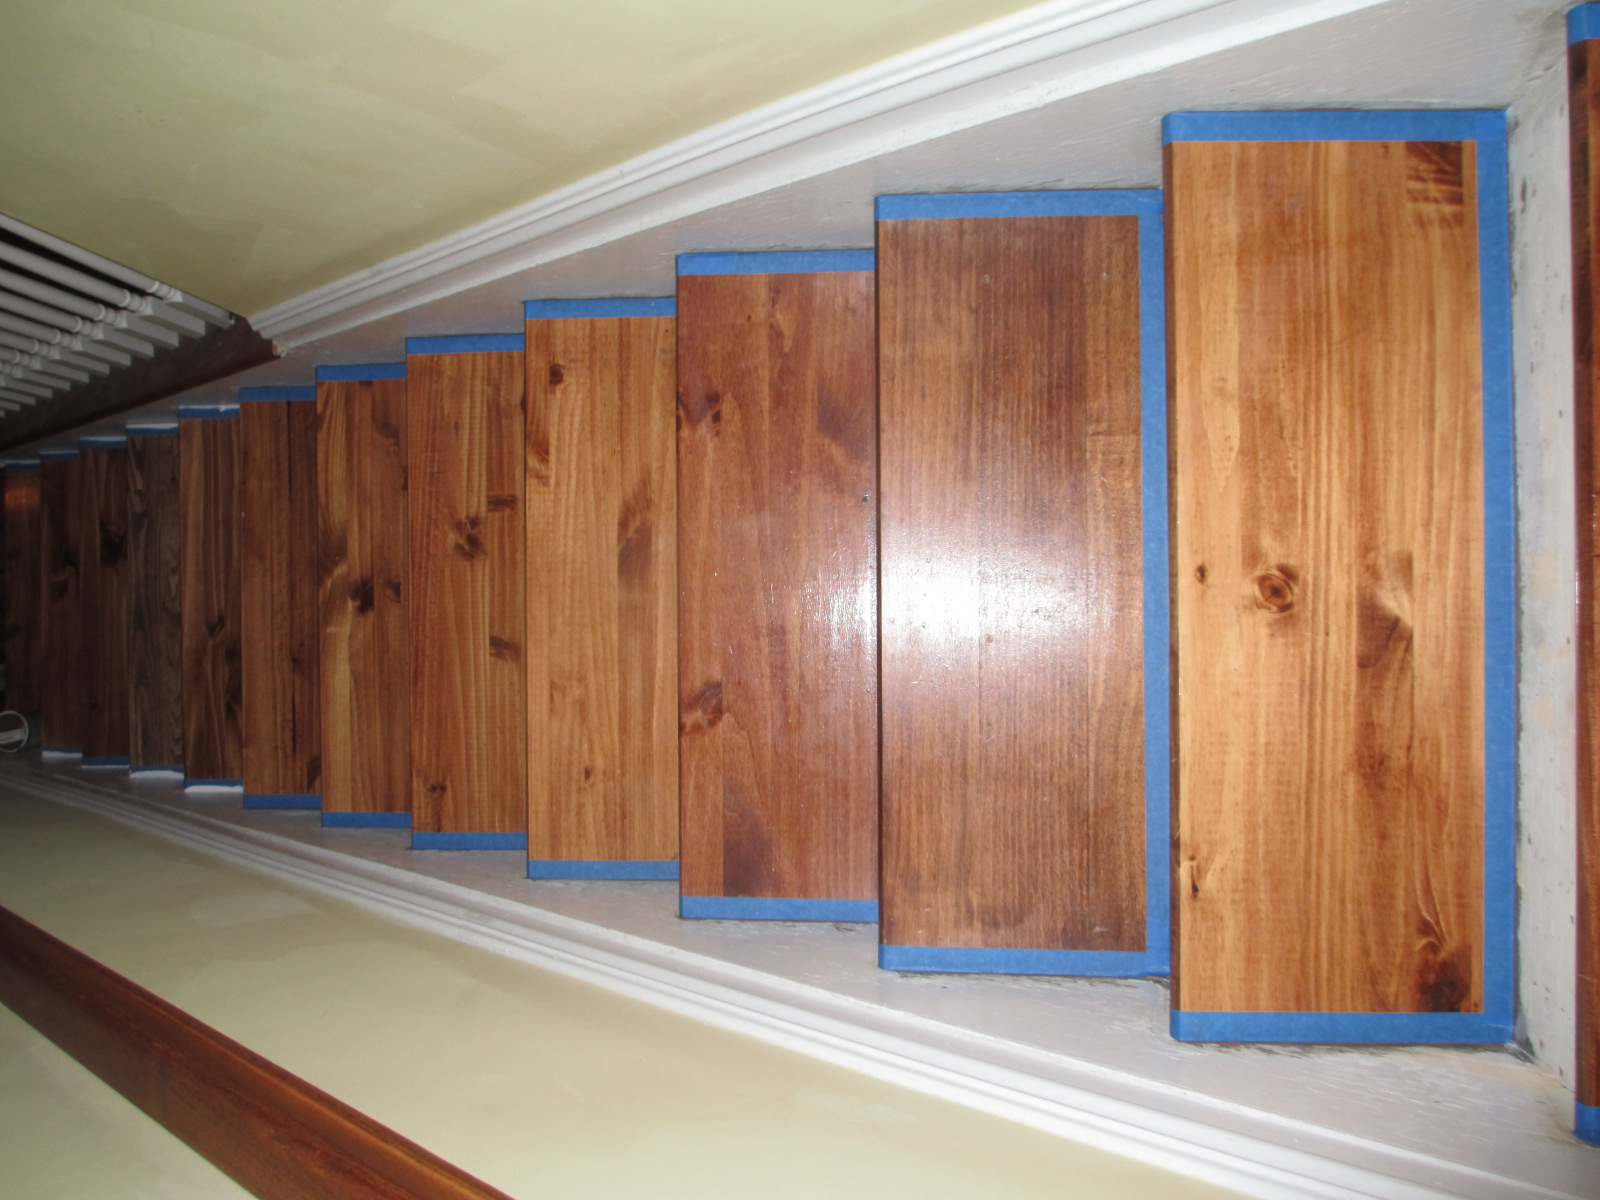
The stair saga continues! This weekend, while I was still recovering from an upper respiratory infection, we finished up painting the stairs. 

Since my last post on the stair project (read more about that here, and here), I stained the remaining lonely tread. In preparation for painting I took a trip to my local Lowes to pick up some white paint. I don't know if you have ever tried to buy white paint, but there are like 100 shades of white. Seriously!?! After a  long stare I decided on Valspar's Ultra White. It has to be white, right? I'm telling you, I figured if it had white in the name I couldn't go wrong after looking at so many paint chips. I chose a interior semi-gloss for a little bit of gloss and scrubability.
I also picked up my new favorite paintbrush, the wooster. 
Isn't he cute? I figured that a short handled brush would come in handy in the tight corners of the stairwell.
Items used:

the wooster
quart of paint from Lowes in Ultra White
blue painters tape
paper towels

The first step I took was to sweep and vacuum the stairs to get rid of the debris, dust, and pet hair before taping. I then taped off each tread where it met the riser and the stringer (the right and left side of the stairwell).
After that, the wooster and I got our paint on. The painting did not take very long, but it was very obvious that it it would require additional coats. So today, J had the duty of applying the second coat. (Here's your shout out J!) After a second coat and tape removal, here's what we currently have-
And just for comparison here is where we started...you can see the carpet at the top...
And during....
And currently again...


ooooooooh, ahhhhhhh! Look at those beautiful stairs!

There are only a few minor steps left before we're done with this project all together.

1) Apply trim right below each tread where it meets the riser below it. This will help further seal the stair, as nothing is square, even or perfect in this ole' house.

2) Recaulk around the edge of each tread.When removing the tape, we discovered some paint seepage that is less than beautiful. See below...
3) Order and install some stair jewelery. Again, there are a few gaps in the original construction of the stairs, especially on the right side. So not only will the dust corners add some bling, but also help further seal out creeper crawlers and drafts.

Almost there...!